When You See “Rebase Conflicts”
After clicking the rebase button, if your changes conflict with the base branch, your task status changes to “Rebase conflicts” and a conflict resolution banner appears.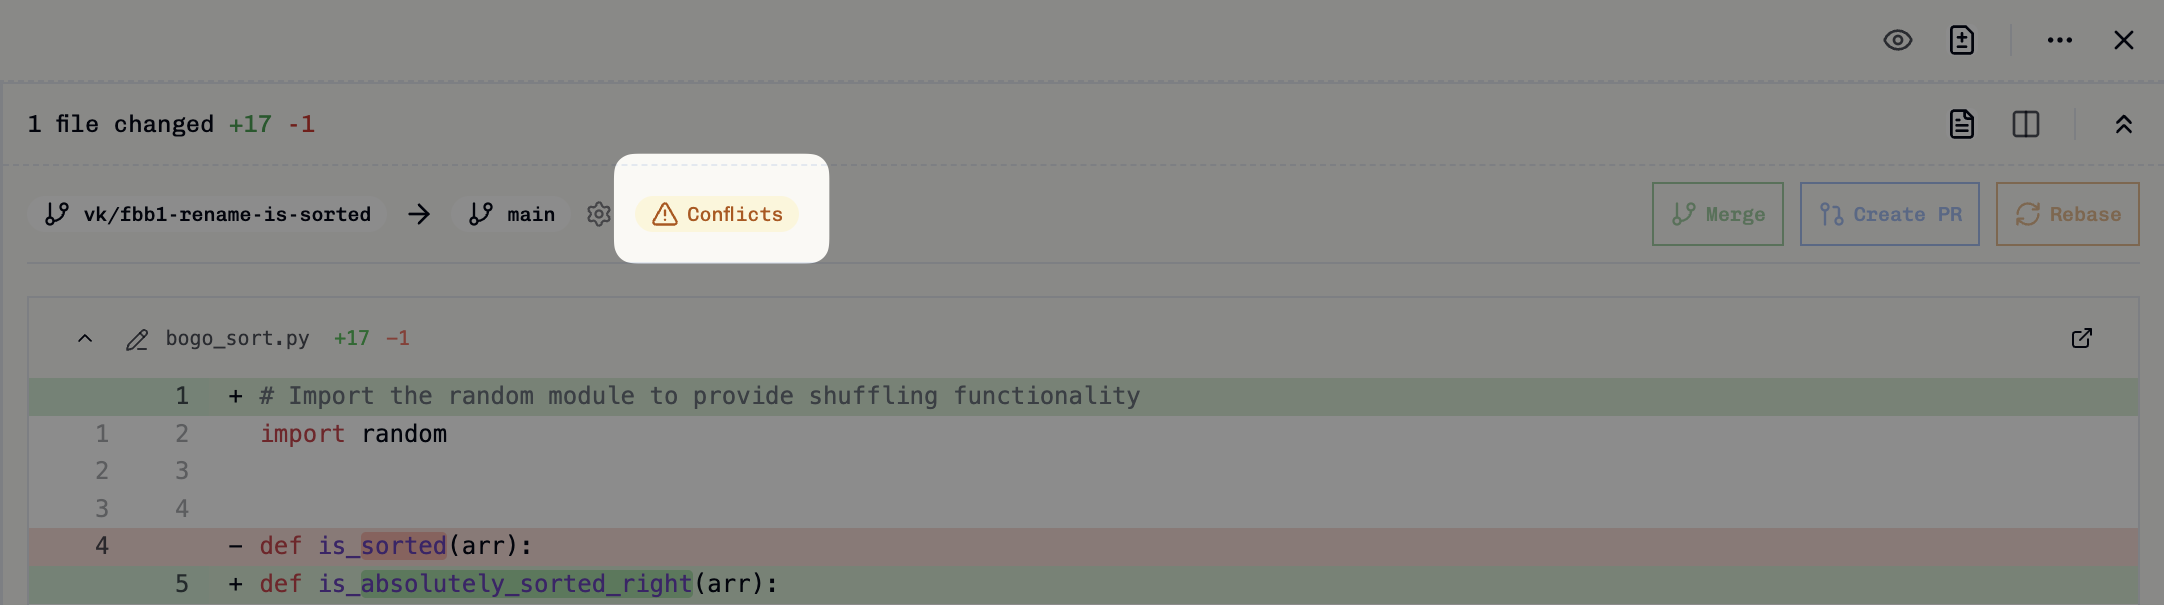
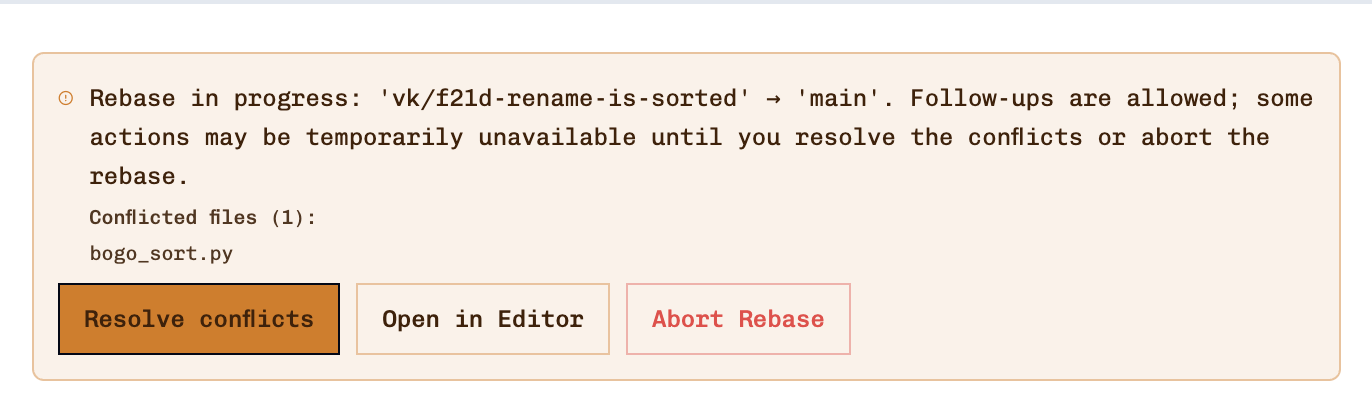
- Resolve Conflicts - Auto-generate resolution instructions for the coding agent
- Open in Editor - Manually edit conflicted files
- Abort Rebase - Cancel and return to previous state
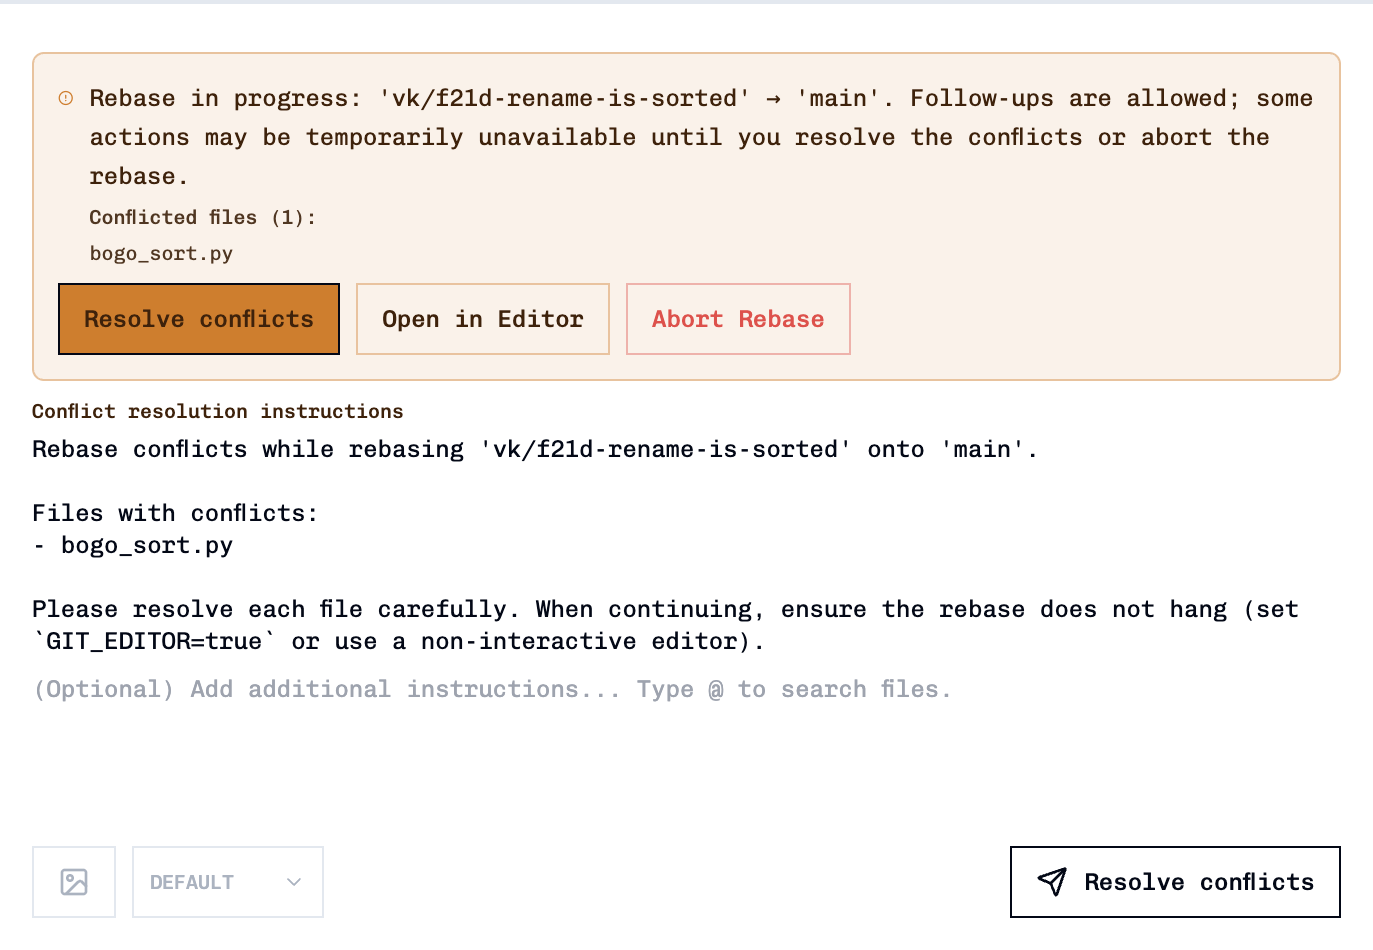
Resolving Conflicts Automatically
The simplest solution is to let the coding agent resolve conflicts automatically:- Click Resolve Conflicts from the conflict banner to generate specific instructions tailored to your conflict situation and insert them into the follow-up message area.
- Review the generated instructions and click Resolve Conflicts (the Send button changes to this) to have the agent analyse the conflicted files and complete the rebase automatically.
Manual Resolution (Alternative)
If you prefer to resolve conflicts manually, you have two options: For single files: Use Open in Editor from the conflict banner to edit one conflicted file at a time. After resolving and refreshing the page, you can press the button again for the next file. For multiple files (recommended): Click the triple dot icon at the top right of the task and select Open in [Your IDE] to open all worktree files in your chosen IDE, where you can resolve all conflicts at once.1
Open your IDE
Click the triple dot icon at the top right and select Open in [Your IDE] to access all worktree files, or use Open in Editor from the banner for individual files.
2
Edit conflicted files
Resolve merge markers in each file:
3
Continue the rebase
After editing all conflicts, stage and continue:
Aborting a Rebase
If you need to cancel the rebase entirely, click Abort Rebase to return to the “Rebase needed” state. You can then try rebasing again or create a new task attempt from the updated base branch.Rebasing onto a Different Base Branch
If you’ve changed the base branch of your task attempt and see commits unrelated to your changes, you can usegit rebase --onto to rebase only your work onto the new base:
Example Scenario
You accidentally created a task attempt from thedevelop branch, but it should have been based on main. After changing the base branch to main in the task settings, you see commits from develop that aren’t part of your work:
main, excluding the unrelated commits from develop.